How to change Azure Premium Disk Performance tiers without downtime
On Azure Premium disks, we can change the performance tier even when it is connected to running virtual machines. With Premium SSD performance tiers, we have the flexibility to scale drive performance without increasing the size of the drive by selecting a higher performance tier and returning it to its original performance tier, allowing us to fine-tune the performance to our needs and save money. In this post, I will show you how to change the tier of a premium disk using Azure PowerShell and CLI. Important:
- A disk’s performance tier can be downgraded only once every 12 hours.
Azure PowerShell Workaround #
If you want to know how to install the PowerShell Azure module on your machine, check out this link. The simplest way to get started is to sign in interactively at the command line.
Connect-AzAccount
This cmdlet will bring up a dialog box prompting you for your email address and password associated with your Azure account. If you have more than one subscription associated with your mail account, you can choose the default subscription. To perform this task, we will use the following commands:
Get-AzSubscription
Select-AzSubscription -Subscription "My Subscription"
Once you set your default subscription, you’re ready to start.
Set the variables #
Here, we define the characteristics of our environment and the resource’s properties.
$resourceGroupName='RG-DEMO-WE'
$diskName='VM-DEMO-WE_OsDisk_1'
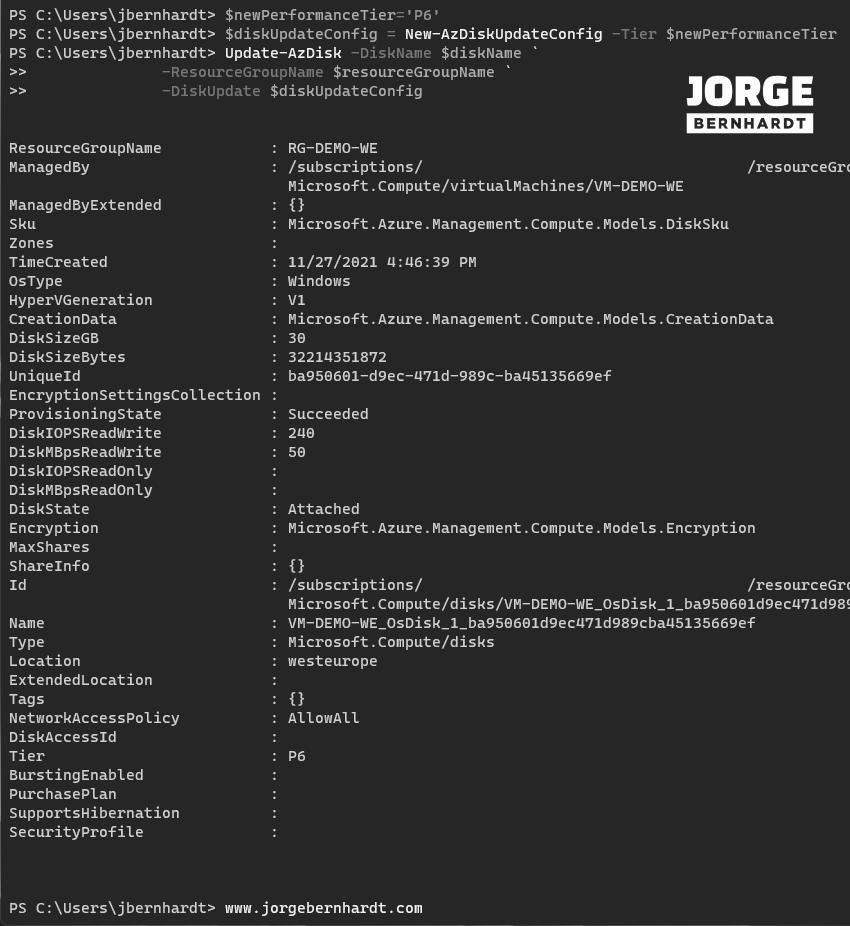
$newPerformanceTier='P6'
In my case, I know the disk’s name to which I want to change the performance tier, but if you don’t know the disk’s name, the following command can be helpful for you. Get the list of premium disks in a resource group To get the names of the premium disks within a resource group. You should use the Get-AzDisk cmdlet with the following syntax.
Get-AzDisk `
    -ResourceGroupName $resourceGroupName `
    | Where-Object {$\_.Tier -notlike ""} `
    | Select-Object Name, Tier
Once you have located the disk’s name that you want to change the performance tier, you are ready to move on to the next step.
Update the performance tier of the disk #
To perform the performance tier change on your disk, you should first create a configurable disk update object using the New-AzDiskUpdateConfig cmdlet and then use this object in the Update-AzDisk cmdlet using the following syntax.
$diskUpdateConfig = New-AzDiskUpdateConfig -Tier $newPerformanceTier

Update-AzDisk `
    -DiskName $diskName `
    -ResourceGroupName $resourceGroupName `
    -DiskUpdate $diskUpdateConfig
Verify the changes made #
Once the previous step is done, to verify that the change was successful, use the Get-AzDisk cmdlet with the following syntax
Get-AzDisk  `
    -DiskName $diskName `
    -ResourceGroupName $resourceGroupName `
    | select-object Name, Tier
Azure CLI Workaround #
In this case, we will use Azure Cloud Shell, a browser-based shell built into Azure Portal. This allows us to use the Azure command-line tools (Azure CLI and Azure PowerShell) directly from a browser. If you want to know more about Azure Cloud Shell, check out this link. First, we define the characteristics of our environment and store the values in variables.
resourceGroupName='RG-DEMO-WE'
diskName='VM-DEMO-WE_OsDisk_1'
performanceTier='P6'
In my case, I know the disk’s name to which I want to change the performance tier, but if you don’t know the disk’s name, the following command can be helpful for you. Get the list of premium disks in a resource group To get the names of the premium disks within a resource group. You should use the following command.
az disk list \
-g $resourceGroupName \
--query "[*].{Name:name,Tier:tier}" \
-o table
Update the performance tier of the disk #
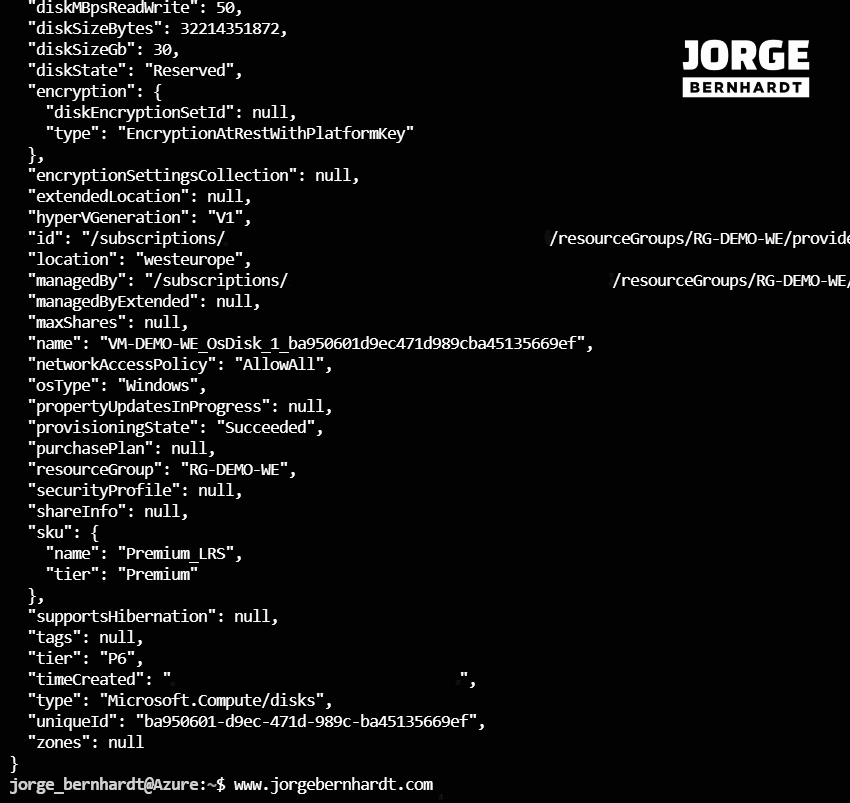
To perform the performance tier change on your disk, you should use the following command.
az disk update \
-n $diskName \
-g $resourceGroupName \
--set tier=$performanceTier
Verify the changes made #
Once the previous step is done, use the following command to verify that the change was successful.
az disk show \
-n $diskName \
-g $resourceGroupName \
--query [name,tier] \
-o table
Thanks for reading my post. I hope you find it helpful. If you want to know more about performance tiers for managed disks, check out this link.