Some time ago, I wrote a post showing how to deploy an Azure VPN S2S (site-to-site) from scratch. But this time, I will use the new PowerShell Az module and show you how to deploy it in an existing Azure virtual network. Requirements: This tutorial assumes that you already have a Microsoft Azure account set up and you have the PowerShell Azure module on your machine installed. If you want to know how to install the PowerShell Azure module on your machine, check out this
link. The simplest way to get started is to sign in interactively at the command line.
Connect-AzAccount
This cmdlet will bring up a dialog box prompting you for your email address and password associated with your Azure account. If you have more than one subscription associated with your mail account, you can choose the default subscription. To perform this task, we will use the following commands:
Here, we define the characteristics of our environment and the properties of the connection.
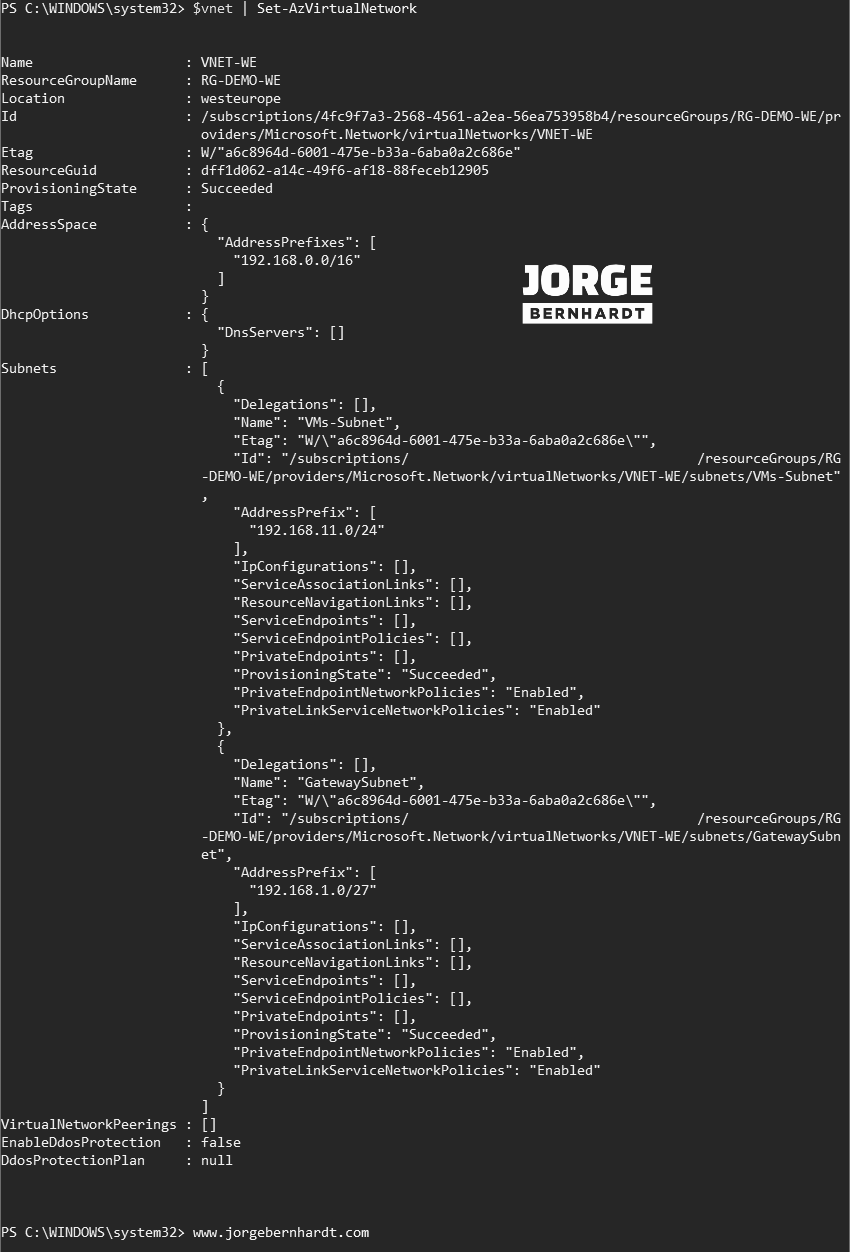
$resourceGroupName='RG-DEMO-WE'$location='westeurope'$virtualNetworkName='VNET-WE'#Subnets$gatewaySubnetName='GatewaySubnet'$gatewayAdressPrefix='192.168.1.0/27'#Public IP Address$publicIPGatewayName='AZ-VNG-PIP'$ipAllocation='Dynamic'#Dynamic, Static#Local Network Gateway$localNetworkGatewayName='GW-Local'$publicIpLNG='0.0.0.0'#the IP address of your on-premises VPN device$privatePrefixLNG='172.16.1.0/24'#The $PrivatePrefixLNG is your on-premises address space#Virtual Network Gateway$azureVirtualGatewayName='GW-AZ'$gatewayType='vpn'#Vpn, ExpressRoute$vpnType='RouteBased'#PolicyBased, RouteBased$gatewaySku='Basic'#Select the SKU that best meets your requirements based on the types of workloads, performance, features, and SLAs.#Gateway Connection properties$gatewayConnectionName='AZ-Local'$sharedKey='T5jE0nWR7SWQwqcyTErr'#The value here must match the value that you are using for your VPN device$connectionType='IPSec'#IPsec, Vnet2Vnet, ExpressRoute, VPNClient$routingWeight='10'#Default value 10 (optional)
You should create a new subnet in your network configuration, and it must be called “GatewaySubnet”. To do this, use the Add-AzVirtualNetworkSubnetConfig cmdlet with the following syntax.
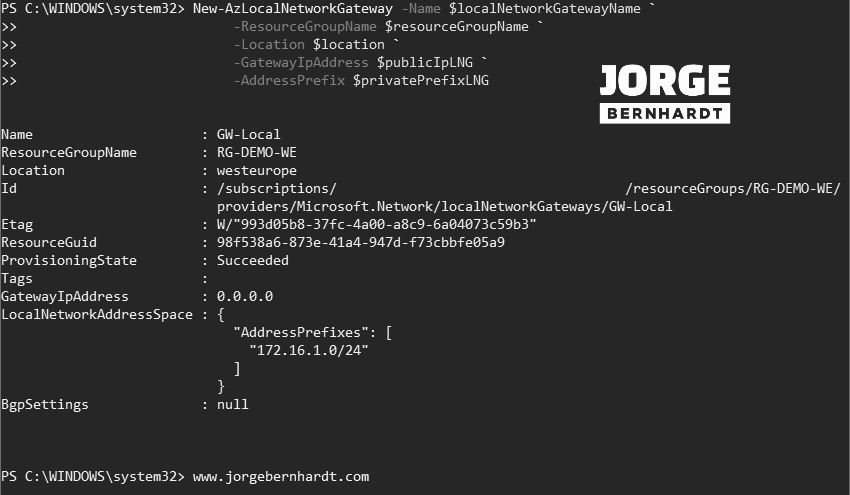
Create a local network gateway for your on-premises gateway>
Create a local network gateway for your on-premises gateway
#
Then, you should create a Local Network Gateway using the values of the public IP address of your VPN device, as well as the address prefix of your local network. To do this, use the New-AzLocalNetworkGateway cmdlet with the following syntax
Once the public IP is created, you should first establish the IP configuration using the New-AzvirtualNetworkGatewayIpConfig cmdlet and then create the Azure VPN Gateway using the New-AzVirtualNetworkGateway cmdlet with the following syntax.
#Create the gateway IP addressing configuration$vnet=Get-AzVirtualNetwork`-Name$virtualNetworkName`-ResourceGroupName$resourceGroupName$subnet=Get-AzVirtualNetworkSubnetConfig`-Name$gatewaySubnetName`-VirtualNetwork$vnet$gatewayipconfig=New-AzvirtualNetworkGatewayIpConfig`-Namegwipconfig1`-SubnetId$subnet.Id`-PublicIpAddressId$gatewaypip.Id#Create the VPN gatewayNew-AzVirtualNetworkGateway`-Name$azureVirtualGatewayName`-ResourceGroupName$resourceGroupName`-Location$location`-IpConfigurations$gatewayipconfig`-GatewayType$gatewayType`-VpnType$vpnType`-GatewaySku$gatewaySku
In this step, you have already configured your VPN device using the public IP of the Azure VPN Gateway and the shared key. To create a connection between the Azure VPN Gateway and your VPN device on-premise, you should use the New-AzVirtualNetworkGatewayConnection cmdlet with the following syntax.