How to manage outbound spam policies with Exchange Online PowerShell
Exchange Online Protection (EOP) uses outbound spam policies as part of your organization’s defense against spam. But to increase the effectiveness of outbound spam filtering, you can create custom spam policies with more stringent settings that apply to specific users or groups. These custom policies take precedence over the default policy, but you can change the priority of your custom policies. Today I will show you how to manage these custom policies using PowerShell, but you can also make these settings from the Microsoft 365 defender portal. Important: You should use your Exchange admin account to perform the following task.
PowerShell Workaround #
First, you must ensure the Exchange Online PowerShell V2 module is installed on your computer and then imported into your Powershell session. To do that, you should use the following commands.
Install-Module -Name ExchangeOnlineManagement
Import-Module -Name ExchangeOnlineManagement
Once you have imported the module, you are ready to start.
Connect to Exchange Online #
The easiest way to get started is to log in interactively at the command line.
Connect-ExchangeOnline
Set the variables #
Here we define the basic information of the spam policy and spam rule we want to create/manage.
$policyName="MyOutboundSpamPolicy"
$ruleName="MySpamRule"
Create the outbound spam filter policy #
first, you need to create an outbound filter policy, and for this, you should use the New-HostedOutboundSpamFilterPolicy cmdlet.
New-HostedOutboundSpamFilterPolicy `
    -Name $policyName `
    -AdminDisplayName "My Outbound Spam Policy" `
    -RecipientLimitExternalPerHour 200 `
    -RecipientLimitInternalPerHour 500 `
    -RecipientLimitPerDay 700 `
    -ActionWhenThresholdReached BlockUser
In this policy, you define the limits of sending emails, and the action is triggered once one of the prescribed limits is reached.
Change an outbound spam filter policy. #
You should use the Set-HostedOutboundSpamFilterPolicy cmdlet to modify an outbound spam filter policy.
Set-HostedOutboundSpamFilterPolicy `
    -Identity $policyName `
    -ActionWhenThresholdReached BlockUserForToday
The ActionWhenThresholdReached parameter specifies the action to take when any of the limits set in the policy are reached.
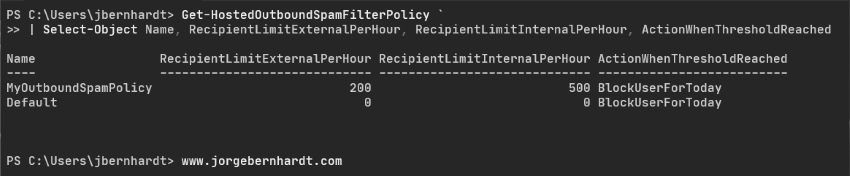
Check outbound spam filter policies #
To view outgoing spam filter policies, you should use the Get-HostedOutboundSpamFilterPolicy cmdlet. If this is the first policy you create, the list will likely have two entries: the default policy and the newly created one.
Get-HostedOutboundSpamFilterPolicy `
    | Select-Object Name, RecipientLimitExternalPerHour, RecipientLimitInternalPerHour, ActionWhenThresholdReached
Create an outbound spam filter rule #
Once the outbound spam filter policy is created, you will need to create an outbound spam filter rule associated with the policy you created.
New-HostedOutboundSpamFilterRule `
    -Name $ruleName `
    -HostedOutboundSpamFilterPolicy $policyName `
    -from "[email protected]"
Important: An outbound spam filter rule can’t be associated with more than one outbound filter policy.
Change an outbound spam filter rule. #
To make changes to the configuration of an outgoing spam filter rule, you should use the Set-HostedOutboundSpamFilterRule cmdlet. In the following example, I will change the rule assigned to a group and remove the assignment from the user.
Set-HostedOutboundSpamFilterRule `
    -Identity $ruleName `
    -FromMemberOf "DemoM365Group" `
    -From $null
You can also use the same cmdlet to change the rule’s priority, as shown in the following example.
Set-HostedOutboundSpamFilterRule `
    -Identity $ruleName `
    -Priority 2
The Priority parameter specifies a priority value that determines the order in which the rule is processed. A lower value indicates a higher priority; therefore, the value 0 is the highest priority. Note that rules cannot have the same priority value.
Check outbound spam filter rules #
To get a summary list of all outbound spam filter rules, you should use the Get-HostedOutboundSpamFilterRule cmdlet.
Get-HostedOutboundSpamFilterRule `
    | Format-Table
Disable a spam rule #
If you want to disable a rule, use the Disable-HostedOutboundSpamFilterRule cmdlet with the following syntax.
Disable-HostedOutboundSpamFilterRule `
    -Identity $ruleNameinstead
Enable a spam rule #
Instead, the Enable-HostedOutboundSpamFilterRule cmdlet enables the rule again.
Enable-HostedOutboundSpamFilterRule `
    -Identity $ruleName
Remove an outbound spam filter policy #
To remove an outbound spam filter policy, you should use the Remove-HostedOutboundSpamFilterPolicy cmdlet with the following syntax.
Remove-HostedOutboundSpamFilterPolicy `
    -Identity $policyName
Keep in mind that the corresponding outbound spam filter rule is not removed when you use PowerShell to remove an outbound spam filter policy.
Remove an outbound spam filter rule #
To finally remove an outgoing spam filter rule, use the Remove-HostedOutboundSpamFilterRule cmdlet with the following syntax.
Remove-HostedOutboundSpamFilterRule `
    -Identity $ruleName
Thanks for reading my post. I hope you find it helpful.
If you want to learn more about outbound spam filtering, check out this link.