How to configure Azure Security Center notifications
In this mini-post, I will explain something essential that you should configure when you start the Azure Security Center configuration, the security notifications. Today I will explain how to do this configuration using PowerShell and Azure CLI.
Prerequisites
- This tutorial assumes that you already have a Microsoft Azure account configured.
- The Az. Security module must be installed.
Azure PowerShell Workaround #
The simplest way to get started is to sign in interactively at the command line.
Connect-AzAccount
This cmdlet will bring up a dialog box prompting you for your email address and password associated with your Azure account. If you have more than one subscription associated with your mail account, you can choose the default subscription. To perform this task, you should use the following commands:
Get-AzSubscription
Set-AzContext -Subscription "<subscription ID>"
Register the resource provider #
To register a resources provider in your Azure subscription, you should use the Register-AzResourceProvider cmdlet with the following syntax.
Register-AzResourceProvider -ProviderNamespace 'Microsoft.Security'
Once you set your default subscription, you’re ready to start.
Set a Security Contact #
To define the notification settings, you should use the Set-AzSecurityContact cmdlet with the following syntax.
Set-AzSecurityContact `
    -Name "JorgeBernhardt" `
    -Email "[email protected]" `
    -Phone "555-1234" `
    -AlertAdmin `
    -NotifyOnAlert
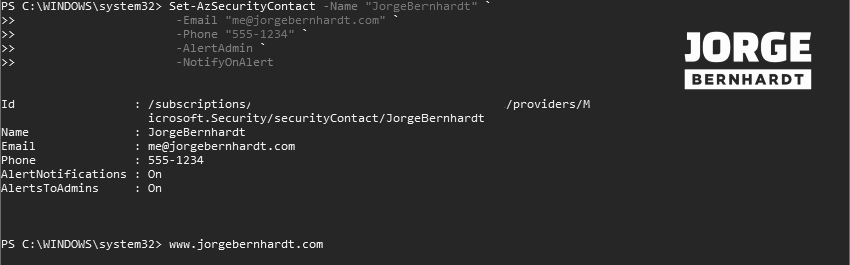
Get-AzSecurityContact `
    -Name "JorgeBernhardt"
Remove a Security Contact #
Finally, to delete a security contact you should use the Remove-AzSecurityContact cmdlet with the following syntax.
Remove-AzSecurityContact `
    -Name "JorgeBernhardt"
Azure CLI Workaround #
In this case, we will use Azure Cloud Shell, a browser-based shell built into Azure Portal. This allows us to use the Azure command-line tools (Azure CLI and Azure PowerShell) directly from a browser. If you want to know more about Azure Cloud Shell, check out this link. Important: First, you need to set up a subscription to use in the current session.
az account list
az account set --subscription "Subscription Name"
Register the resource provider #
To register a resources provider in your Azure subscription, you should use the following command.
az provider register \
--namespace 'Microsoft.Security'
Set a Security Contact #
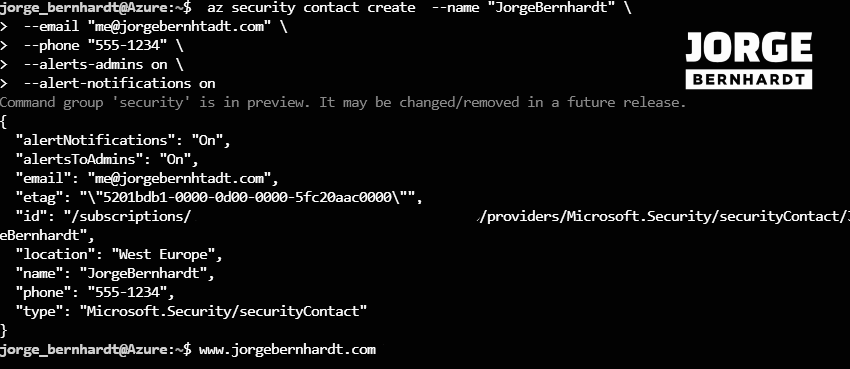
To define the notification settings, you should use the following command.
 az security contact create \
--name "JorgeBernhardt" \
--email "[email protected]" \
--phone "555-1234" \
--alerts-admins on \
--alert-notifications on
az security contact show \
--name "JorgeBernhardt"
But if on the other hand, what you want is to list all the active security contacts in your subscription, you should use the following command.
az security contact list
Remove a Security Contact #
Finally, to delete the security contact, you should use the following command.
az security contact delete \
--name "JorgeBernhardt"
Thanks for reading my post. I hope you find it useful.
In the next post about Azure Security Center, I will explain how to enable automatic provisioning of agents in Azure Security Center.
If you want to know more about Security Center, check out this link.