How to store the Terraform state file in Azure Storage
In this post, I want to show you how to configure terraform to use an Azure storage account to store and protect your tfstate file. To manage the infrastructure and configuration, Terraform writes the status of resources to a tfstate file. By default, this file is called “terraform. tfstate” and is stored locally in JSON format but can also store remotely. It is created by Terraform the first time the terraform plan command is run and will use it each time it is run to compare its state with that of the target infrastructure and return the preview of the changes to be made. Storing the tfstate file in an Azure storage account gives us several advantages such as:
- State locking: Terraform creates a file lock on the state file when running terraform apply, preventing other terraform executions against this state file.
- Encryption at rest: data stored in an Azure blob is encrypted before being persisted.
- Redundancy: The data in Azure Blob Storage is always replicated to ensure durability and high availability.
Prerequisites
- This tutorial assumes that you already have a Microsoft Azure account configured.
- You can use an existing Storage Account, or you can create a new one. If you want to know how to create a Storage Account using PowerShell, check out this link.
Create a container #
The first thing we need to do is create a container in our storage account to locate the tfstate file. To perform this task, we can use Powershell or Azure CLI. I used variables for a more straightforward reading of the code and code reuse in the following examples.
Azure PowerShell Workaround #
To create a container in the storage account, you should use the New-AzStorageContainer cmdlet with the following syntax.
$resourceGroupName = "RG-DEMO-TF"
$storageAccountName = "storageaccountdemostf"
$containerName = "terraform"

$storageAccount = Get-AzStorageAccount `
  -Name "$storageAccountName" `
  -ResourceGroupName $resourceGroupName

New-AzStorageContainer `
  -Name $containerName `
  -Context $storageAccount.Context `
  -Permission blob
Azure CLI Workaround #
In this case, you used the Azure Cloud Shell bash console. To create a container on the storage account, you need to use the following command.
storageAccountName = az storage account show \
--name $storageAccountName \
--query name \
-o tsv

containerName="terraform"

az storage container create \
--name $containerName \
--account-name $storageAccountName
Terraform Backend block #
To store the state file in the blob container created in the previous step, you should include the backend block in your “main.tf” file. The configuration data of this block depends on the authentication method used.
Service Principal #
If you use this authentication method, you should specify the following values.
terraform {
  backend "azurerm" {
    resource_group_name      = "RG-DEMO-TF"
    storage_account_name     = "storageaccountdemostf"
    container_name           = "terraform"
    key                      = "terraform.tfstate"
  }
}
Managed Service Identity #
If you use Managed Service Identity as an authentication method, you should specify the following values in the “backend” block.
terraform {
  backend "azurerm" {
    storage_account_name     = "storageaccountdemostf"
    container_name           = "terraform"
    key                      = "terraform.tfstate"
    use_msi = true
    subscription_id          = "<your_subscription\_id>"
    tenant_id                = "<your_tenant_id>"
  }
}
Storage Account Access Key #
In case you prefer to use a Storage Account Access Key as an authentication method, you should define the following values in the backend block.
terraform {
  backend "azurerm" {
    storage_account_name     = "storageaccountdemostf"
    container_name           = "terraform"
    key                      = "terraform.tfstate"
    access_key               = "<your_storage_account_access_key>"
  }
}
Storage Account SAS Token #
And finally, if the authentication method used by you is a SAS Token, the backend block should contain the following values.
terraform {
  backend "azurerm" {
    storage_account_name     = "storageaccountdemostf"
    container_name           = "terraform"
    key                      = "terraform.tfstate"
    sas_token                = "<your_storage_account_sas_token>"
  }
}
Create and apply a Terraform execution plan #
In this example, I will run it from my Azure cloud shell session, and my configuration file looks like this.
provider "azurerm" {
  features {}
}
terraform {
  backend "azurerm" {
    resource_group_name      = "RG-DEMO-TF"
    storage_account_name     = "storageaccountdemostf"
    container_name           = "terraform"
    key                      = "terraform.tfstate"
  }
}
resource "azurerm_resource_group" "rg"{
    name = "rg_test"
    location = "westeurope"
    tags = {
        enviroment = "www.jorgebernhardt.com"
    }
}
Initialize configuration #
To create the “main.tf” file in the Azure cloud shell, you should use the following command.
. code main.tf
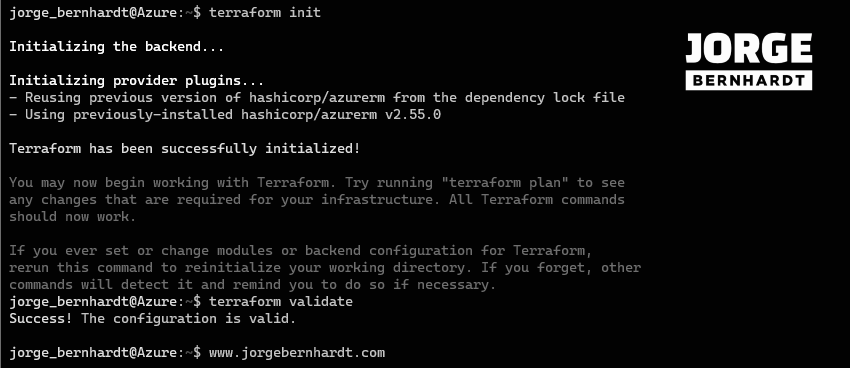
And paste or write the content of your local “main.tf” file and then run the following commands.
terraform init

terraform validate
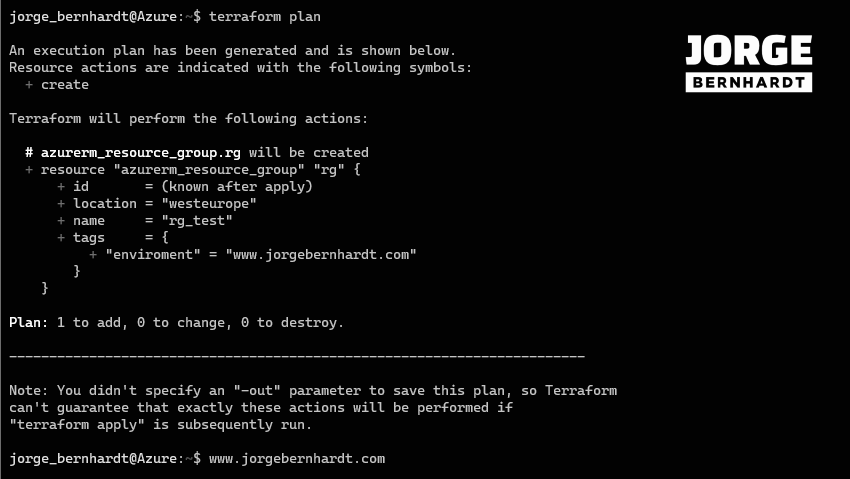
terraform plan
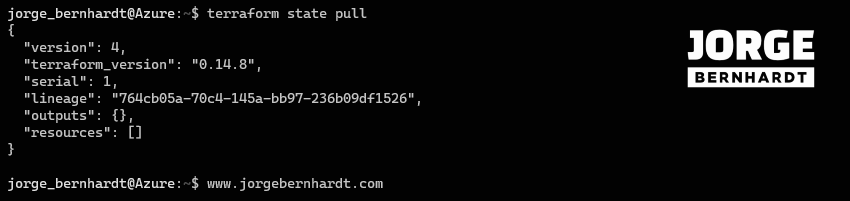
terraform state pull
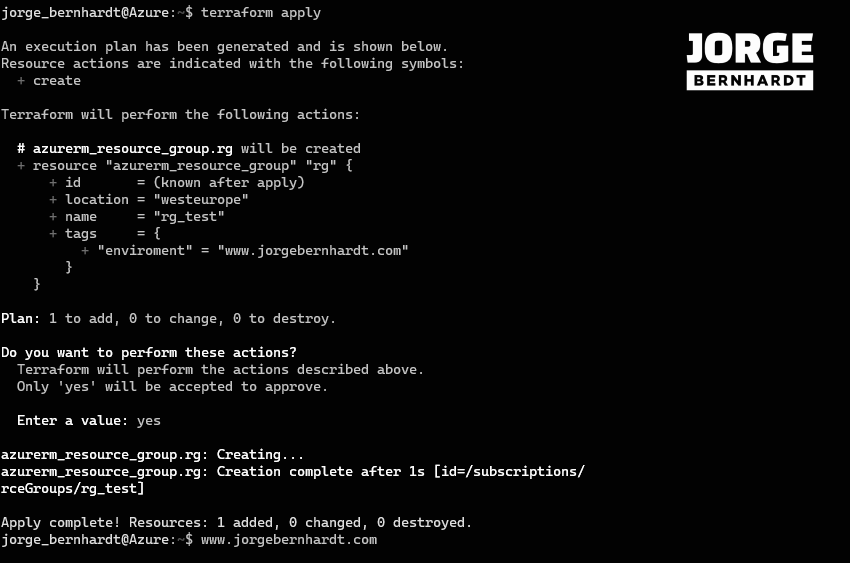
terraform apply
Reverse a Terraform execution plan #
if you want to delete the resource group created in this example, you can use the following command
terraform destroy
Thanks for reading my post. I hope you find it helpful.
If you want to learn more about Terraform backends, check out this link.