How to create a Virtual Network in Microsoft Azure
·741 words·4 mins·100 views·5 likes·
Add-AzureRmVirtualNetworkSubnetConfig Azure CLI Azure PowerShell Get-AzureRmLocation Get-AzureRmResourceGroup Get-AzureRmSubscription Login-AzureRmAccount Microsoft Microsoft Azure Networking New-AzureRmVirtualNetwork Set-AzureRmVirtualNetwork Virtual networks
This post is part of a series in which I will show how to create different resources in Microsoft Azure. Today I will show you how to create an essential component: a Virtual Network.
A virtual network enables many types of Azure resources to communicate privately with each other, and with the internet.
This tutorial assumes that you already have a Microsoft Azure account set up.
If you want to know how to install the PowerShell Azure module on your machine, check out this
link. The simplest way to get started is to sign in interactively at the command line.
Login-AzureRmAccount
This cmdlet will bring up a dialog box prompting you for your email address and password associated with your Azure account. If you have more than one subscription associated with your mail account, you can choose the default subscription. To perform this task we will use the following commands:
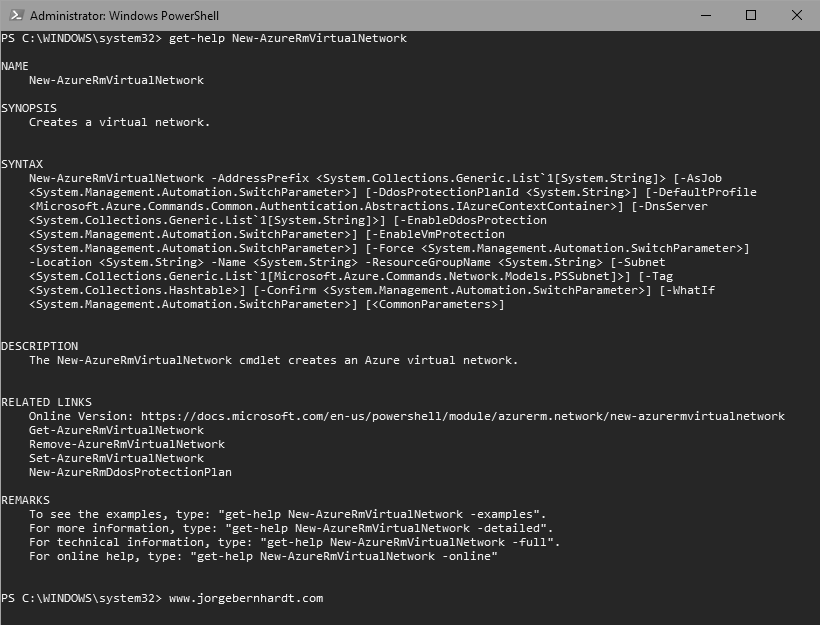
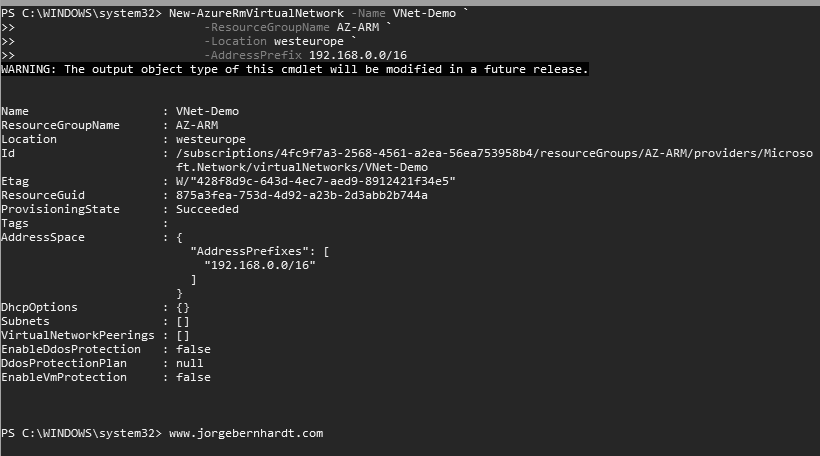
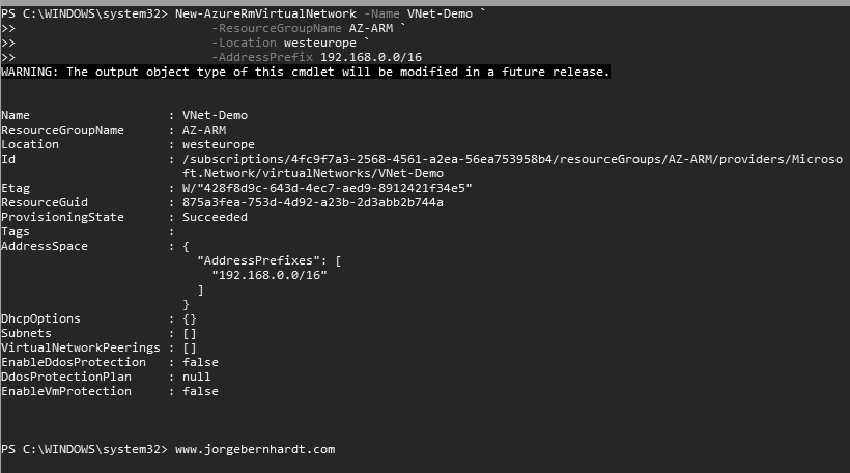
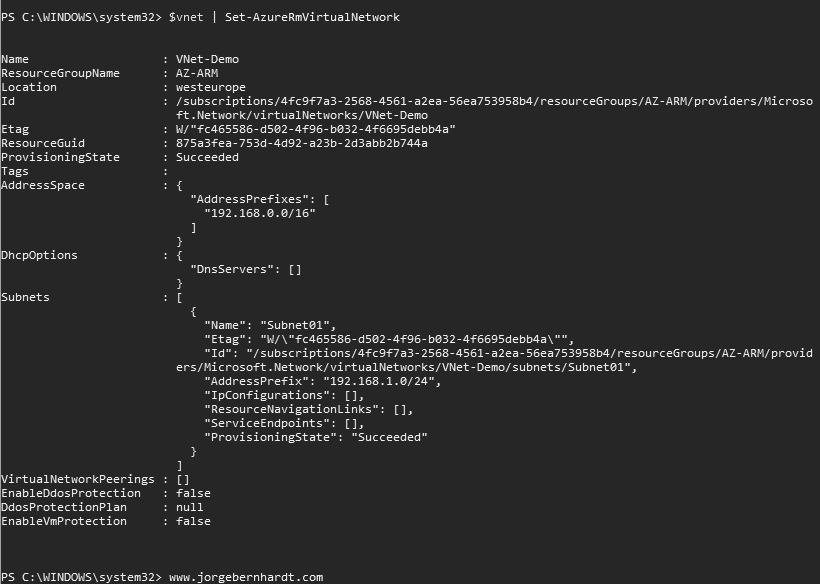
Once you set your default subscription, you are ready to create a Virtual Network with New-AzureRmVirtualNetwork cmdlet. To create a Virtual Network with PowerShell, use the New-AzureRmVirtualNetwork cmdlet with the following syntax:
-Name Specify a representative name of the virtual network. **-ResourceGroupName ** With the following command in PowerShell, we obtain the list of existing resource groups in your subscription.
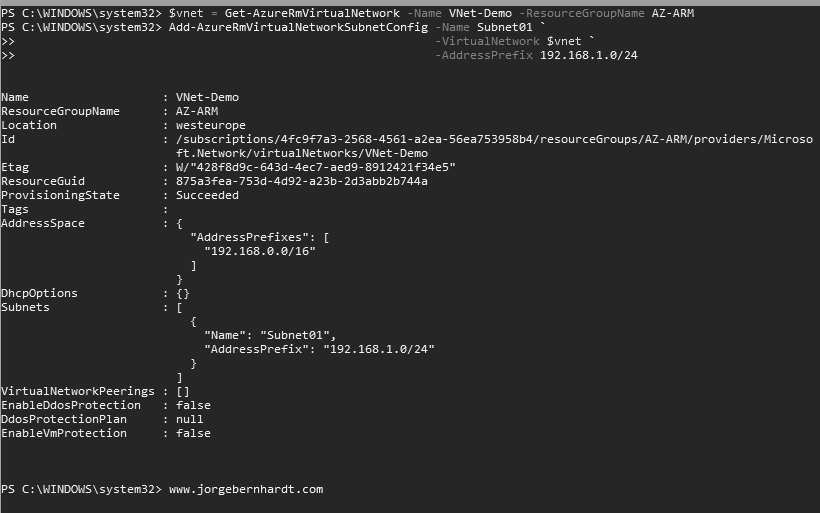
Once you have created your virtual network, you must create one or more subnets for your virtual network. When you segment a virtual network, you are dividing it into smaller network segments. Groups of systems or resources are separating from each other. To create a Virtual Subnet with PowerShell, use the Add-AzureRmVirtualNetworkSubnetConfig cmdlet with the following syntax:
You can use it in your browser with Azure Cloud Shell, or install it on your machine. If you want to know how to install the Azure CLI, check out this
link. The way to get started is to sign in interactively at the command line.
az login
This command will bring up a dialog box prompting you for your email address and password associated with your Azure account. If you have more than one subscription associated with your mail account, you can choose the default subscription. to perform this task we will use the following commands:
az account list
az account set --subscription "Subscription Name"
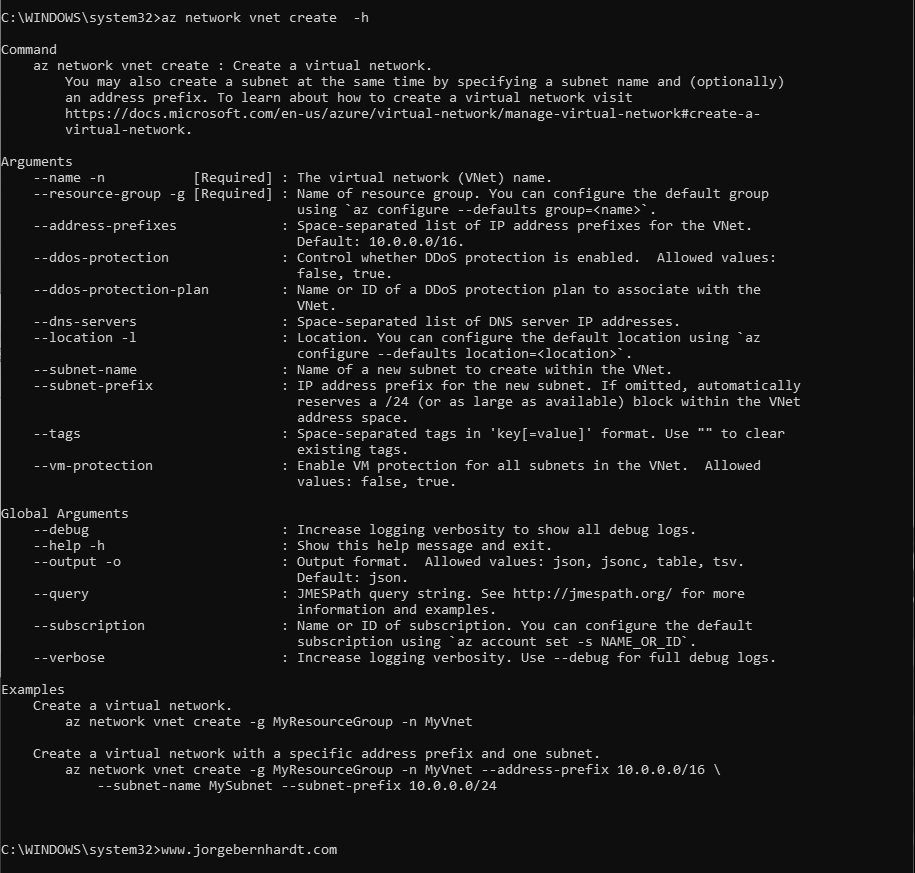
To create a Virtual Network with Azure CLI, use the following syntax:
--name Specify a representative name of the virtual network. **--resource-group ** With the following command in Azure CLI, we obtain the list of existing resource groups in your subscription.
az group list
To create a new resource group with Azure CLI, check out this
link. **--location ** With the following command, we obtain the list of existing locations in Azure.
az account list-locations
--address-prefixes
Specify an IP Address Range.
--subnet-name
Specify a name for the subnet. The subnet name must be unique within the virtual network.
--subnet-prefix
The range of IP addresses for a subnet must be unique within the address space for the virtual network and cannot overlap with other subnet address ranges within the virtual network.
As you can see in the screenshot, you can use the online command help with the –help or -h parameter. You can check the task by running the following command, the -g parameter indicates the Resource Group:
az network vnet list \
-g "RG-CLI"
If you want to know more about Virtual Networks, check out this
link.