How to force a network profile in Windows using PowerShell
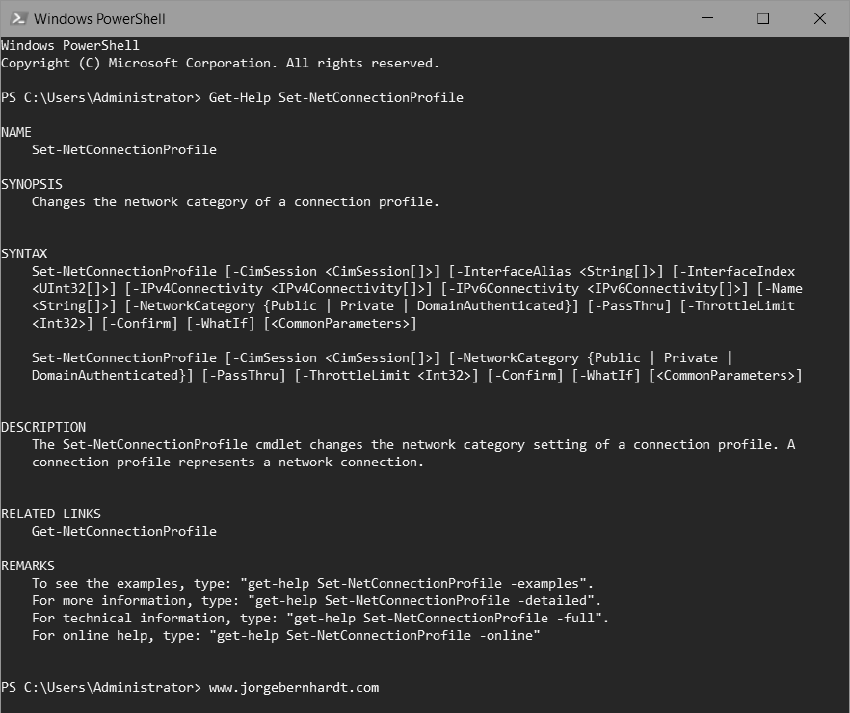
Windows classifies the networks into three different types: public, private and domain, and this allows different firewall configurations to be applied according to the established profile. If you want to force a network to be of a different profile, my recommendation is that you use PowerShell. This time we will use the cmdlet Set-NetConnectionProfile.
Set-NetConnectionProfile `
    -Name <String[]> `
    -InterfaceIndex <UInt32[]> `
    -NetworkCategory <NetworkCategory>
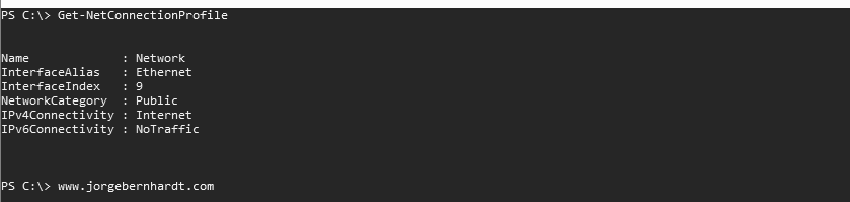
The Get-NetConnectionProfile cmdlet gets a connection profile associated with the physical network adapters. A connection profile represents a network connection.
Get-NetConnectionProfile
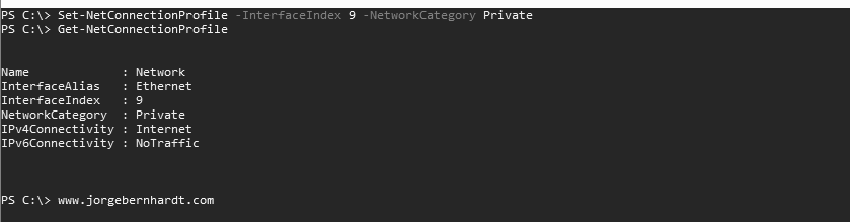
Set-NetConnectionProfile `
    -InterfaceIndex 9 `
    -NetworkCategory Private
This command set the network category, using the -InterfaceIndex parameter.
Thanks for reading my post. I hope you find it useful.
If you want to know more about the Set-NetConnectionProfile cmdlet, check out this link.