How to Implement Nested Virtualization in Windows Server
Hi, Today, I want to show you how to implement nested virtualization in Windows Server. This feature is helpful for testing and training purposes (such as preparing for a certification exam). Nested virtualization is the ability to configure a Hyper-v guest VM to function as a Hyper-v host. Prerequisites:
- You must have a physical host and a virtual machine on that host running Windows Server 2016 or higher.
- The physical host must have an Intel processor with VT-x and Extended Page Tables (EPT) virtualization support.
- The configuration of the virtual machine must be version 8.0 or higher.
Before you install Hyper-v on the VM, you must provide its virtual processor with access to the virtualization technology on the physical computer. To do this, you must shut down the VM and run the following commands as Administrator on the physical Hyper-V host.
Set-VMProcessor `
    -VMName <VMName> `
    -ExposeVirtualizationExtensions $true

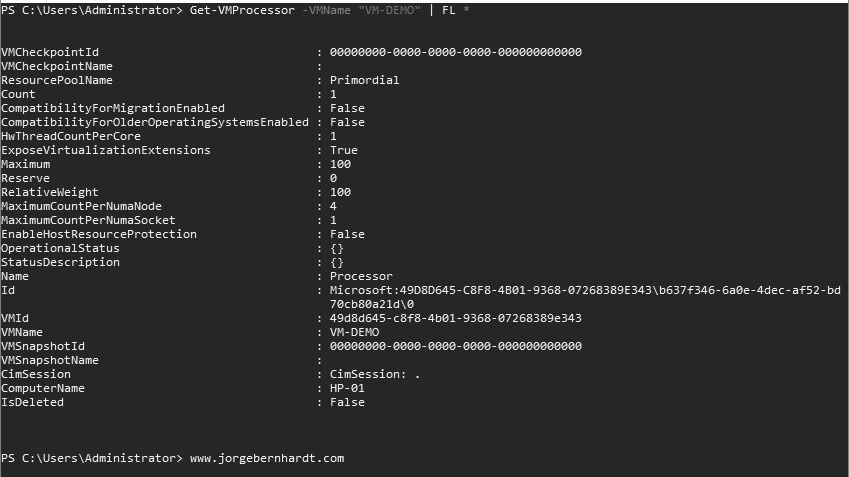
Get-VMProcessor `
    -VMName <VMName> `
    | FL *
Disable Dynamic Memory #
To disable dynamic memory on the virtual machine, use the Set-VMMemory cmdlet with the following syntax:
Set-VMMemory `
    -VMName <VMName> `
    -DynamicMemoryEnabled $false

Enable MAC address spoofing #
To enable MAC Address Spoofing on the virtual machine, use the Set-VMNetworkAdapter cmdlet with the following syntax:
Set-VMNetworkAdapter `
    -VMName <VMName> `
    | Set-VMNetworkAdapter -MacAddressSpoofing On

Important: Virtual machines that are being used with nested virtualization no longer support the following features.
- Live migration.
- Checkpoints.
- Live memory resizing.
- Save and Restore.
Thanks for reading my post. I hope you find it useful.
To learn more about This feature, check out this link.