Connect Azure VNets using VNet Peering
Hello everyone, and happy new year. In the year’s first post, I want to show you how to interconnect Azure Virtual Networks using VNet Peering. Once peered, the VNets appear as one network, and all VMs in the peered VNets can communicate with each other directly.
Azure currently supports two types of peering:
- Virtual network peering: Connecting VNets located in the same region.
- Global virtual network peering: Connecting VNets across Azure regions.
Prerequisites #
- This tutorial assumes that you already have a Microsoft Azure account configured.
- You already have two VNets in the same region whose IP addresses do not overlap. If you want to know how to create a virtual network in Azure, see this link.
Important: There is no service outage during network peering or after the peering is created.
Azure PowerShell Workaround #
If you want to know how to install the PowerShell Azure module on your machine, check out this link. The simplest way to get started is to sign in interactively at the command line.
Connect-AzAccount
This cmdlet will bring up a dialog box prompting you for your email address and password associated with your Azure account. If you have more than one subscription associated with your mail account, you can choose the default subscription. To perform this task, we will use the following commands:
Get-AzSubscription
Select-AzSubscription -Subscription "My Subscription"
Once you set your default subscription, you’re ready to start.
Set the variables #
Here, we define the characteristics of our environment and the resource’s properties. We will use the Get-AzVirtualNetwork cmdlet to assign information about VNet-01 and VNet-02 in two variables.
$resourceGroupName = "RG-DEMO-NE"

$vNet01 = Get-AzVirtualNetwork `
    -Name "VNET-01-NE" `
    -ResourceGroupName $resourceGroupName
$vNet02 = Get-AzVirtualNetwork `
    -Name "VNET-02-NE" `
    -ResourceGroupName $resourceGroupName
Create VNet peering #
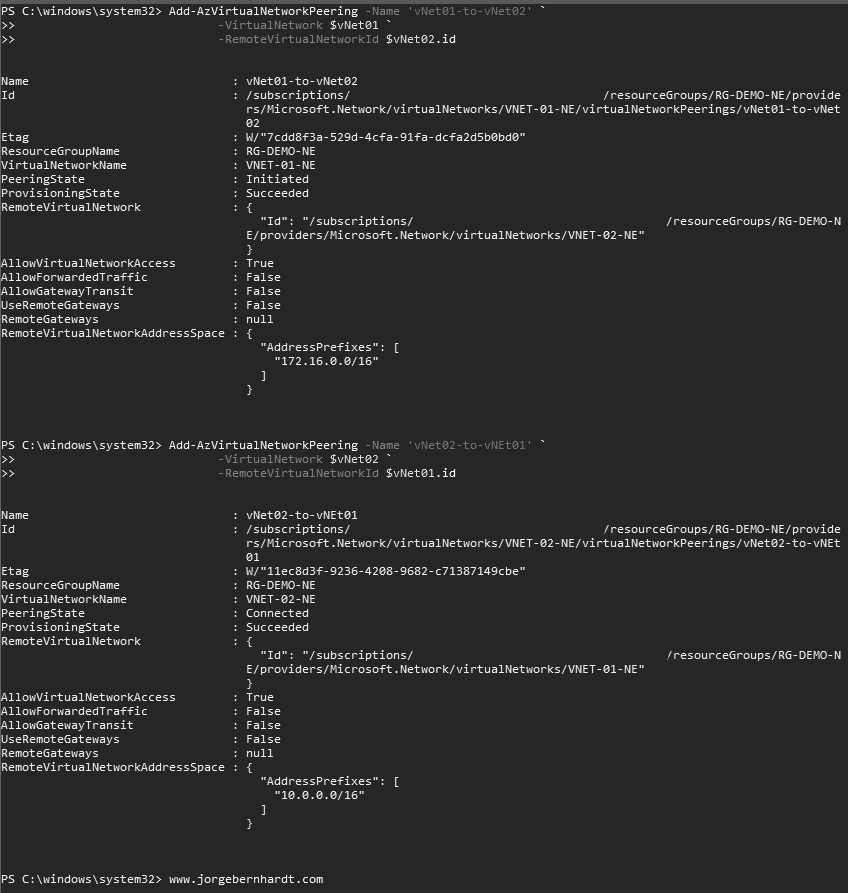
For the peering to work correctly, we must create a peering link from VNET-01-NE to VNET-02_NE and vice versa. To create a new VNet peering using PowerShell, you should use the Add-AzVirtualNetworkPeering cmdlet as shown below:
Add-AzVirtualNetworkPeering `
    -Name 'vNet01-to-vNet02' `
    -VirtualNetwork $vNet01 `
    -RemoteVirtualNetworkId $vNet02.id

Add-AzVirtualNetworkPeering `
    -Name 'vNet02-to-vNEt01' `
    -VirtualNetwork $vNet02 `
    -RemoteVirtualNetworkId $vNet01.id
Check the Peering status #
If you want to verify the peering status of the VNets, you should use the Get-AzVirtualNetworkPeering cmdlet as shown below:
Get-AzVirtualNetworkPeering `
    -ResourceGroupName $resourceGroupName `
    -VirtualNetworkName $vNet01.Name `
    | Format-Table VirtualNetworkName, peeringState
