Jorge Bernhardt Jorge Bernhardt
  1. Posts/

Network Security Groups (NSGs)

·942 words·5 mins· 100 views · 5 likes ·
Azure CLI Azure PowerShell Connect-AzAccount Get-AzNetworkInterface

Hi everyone. In this post, I want to show you how to create a network security group (NSG) and security rules using Azure PowerShell and how to associate these security groups with the different available Azure resources.

A network security group (NSG) is a networking filter containing a list of security rules that when applied will allow or deny network traffic to resources connected to Azure VNets. These rules can manage both inbound and outbound traffic.

Network Security Groups can be associated with:

  • Subnets
  • Network Interfaces attached to VMs
Prerequisites>

Prerequisites #

  • This tutorial assumes that you already have a Microsoft Azure account configured.
  • You already have a properly configured virtual network. If you want to know how to create a virtual network in Azure, see this link.
  • You have a virtual machine (VM) in a subnet.
Azure PowerShell Workaround>

Azure PowerShell Workaround #

If you want to know how to install the PowerShell Azure module on your machine, check out this link. The simplest way to get started is to sign in interactively at the command line.

Connect-AzAccount

This cmdlet will bring up a dialog box prompting you for your email address and password associated with your Azure account. If you have more than one subscription associated with your mail account, you can choose the default subscription. To perform this task, we will use the following commands:

Get-AzSubscription
Select-AzSubscription -Subscription "My Subscription"

Once you set your default subscription, you’re ready to start.

Set the variables>

Set the variables #

Here, we define the characteristics of our environment and the resource’s properties.

$resourceGroupName = "RG-DEMO-NE"
$location = "northeurope"
Create a Security Rule for an NSG>

Create a Security Rule for an NSG #

First, you must create a security rule, which you will then use in the creation of the NSG. To create it, use the New-AzNetworkSecurityRuleConfig cmdlet with the following syntax.

$webRule = New-AzNetworkSecurityRuleConfig `
    -Name "web-rule" `
    -Description "Allow http-https" `
    -Access Allow `
    -Protocol Tcp `
    -Direction Inbound `
    -Priority 100 `
    -SourceAddressPrefix Internet `
    -SourcePortRange * `
    -DestinationAddressPrefix * `
    -DestinationPortRange 80,443
New-AzNetworkSecurityRuleConfig
>

New-AzNetworkSecurityRuleConfig
#

Create a Network Security Group>

Create a Network Security Group #

Once the security rules are created, you can create a network security group. To create it use the New-AzNetworkSecurityGroup cmdlet with the following syntax.

$nsg = New-AzNetworkSecurityGroup `
    -Name "NSG-DEMO" `
    -ResourceGroupName $resourceGroupName `
    -Location  $location `
    -SecurityRules $webRule

NSG Azure
To verify the creation of the NSG, use the Get-AzNetworkSecurityGroup cmdlet with the following syntax to obtain a list of the NSGs within a resource group.

Get-AzNetworkSecurityGroup `
    -ResourceGroupName $resourceGroupName `
    | Select-Object Name, ResourceGroupName, Location
Get-AzNetworkSecurityGroup
>

Get-AzNetworkSecurityGroup
#

List of defined security rules>

List of defined security rules #

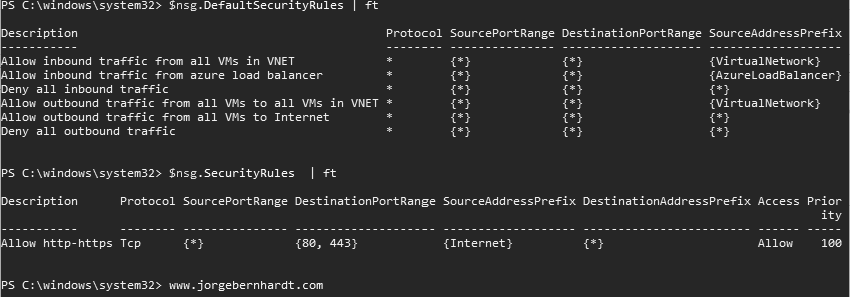
You can also use the following command to list the security rules defined in the NSG. With the following commands, you can see the rules defined by you and the default rules.

$nsg.DefaultSecurityRules | ft
$nsg.SecurityRules  | ft
Azure NSG
>

Azure NSG
#

Associate an NSG from a network interface>

Associate an NSG from a network interface #

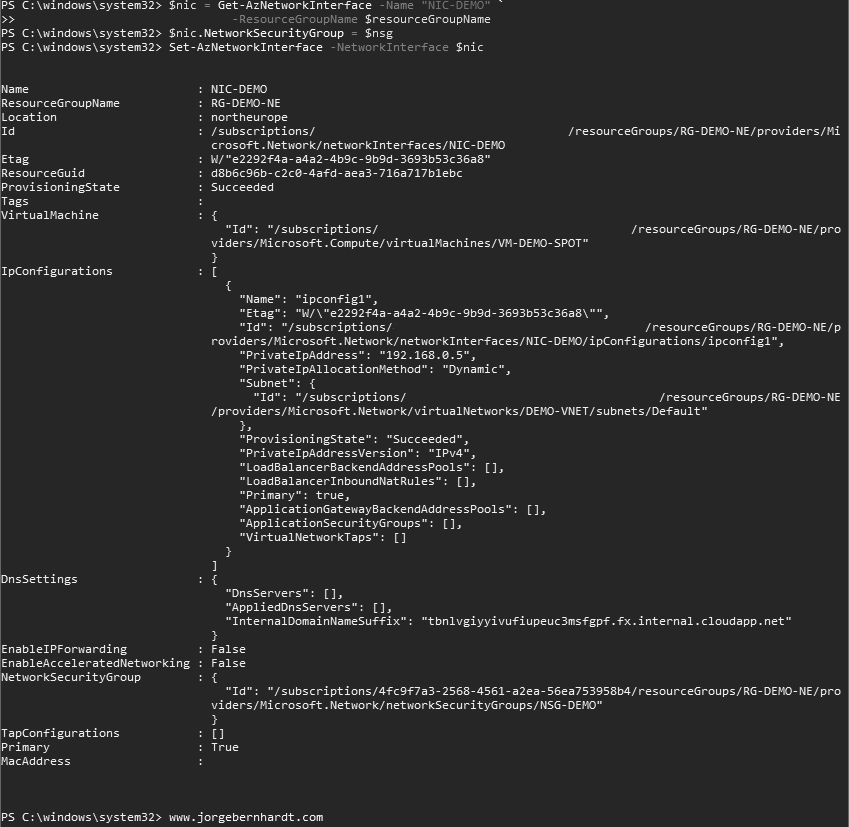
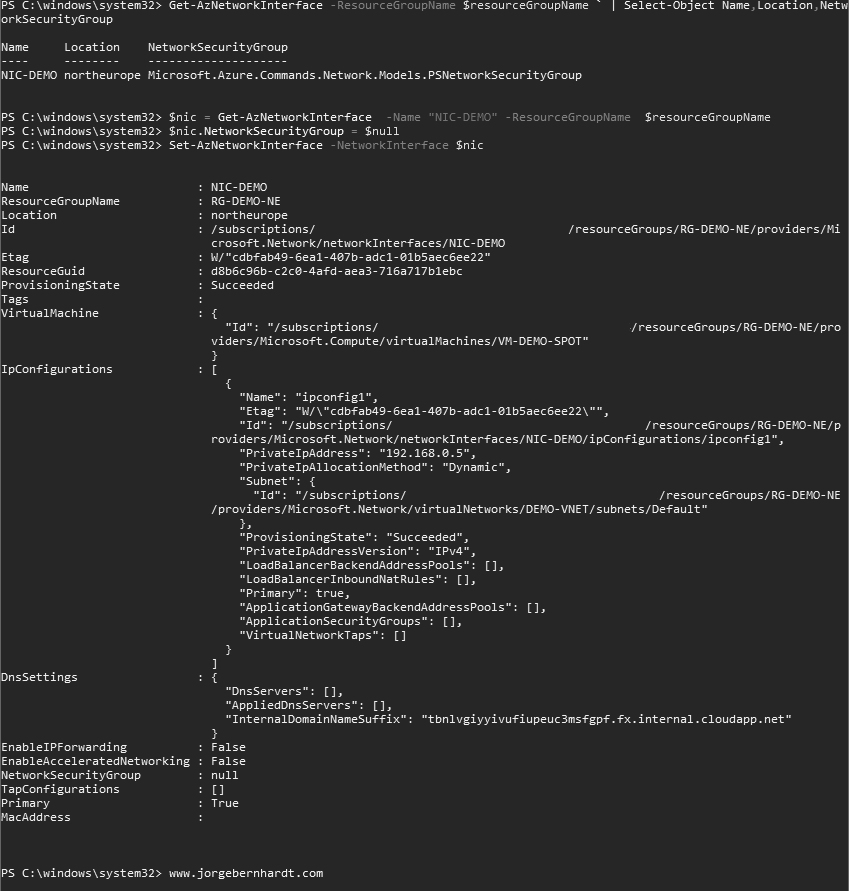
You must first verify that the network interface you want to associate is not already associated with another NSG. To do this you must use the Get-AzNetworkInterface cmdlet with the following syntax.

Get-AzNetworkInterface `
    -ResourceGroupName $resourceGroupName `
    | Select-Object Name,Location,NetworkSecurityGroup

Get-AzNetworkInterface
Once the checks have been made, you can assign the NSG to the network interface using the following commands.

$nic = Get-AzNetworkInterface `
    -Name "NIC-DEMO" `
    -ResourceGroupName $resourceGroupName

$nic.NetworkSecurityGroup = $nsg

Set-AzNetworkInterface `
    -NetworkInterface $nic

Set-AzNetworkInterface.

Remove NSG association from a network interface>

Remove NSG association from a network interface #

If, on the other hand, you want to disassociate an NSG from a network interface, you must follow the steps below.

$nic = Get-AzNetworkInterface  `
    -Name "NIC-DEMO" `
    -ResourceGroupName  $resourceGroupName

$nic.NetworkSecurityGroup = $null

Set-AzNetworkInterface `
    -NetworkInterface $nic

Set-AzNetworkInterface
To verify that the network interface is no longer associated with an NSG, use the following command.

Get-AzNetworkInterface `
    -ResourceGroupName $resourceGroupName `
    | Select-Object Name,Location,NetworkSecurityGroup
Associate an NSG from Subnet>

Associate an NSG from Subnet #

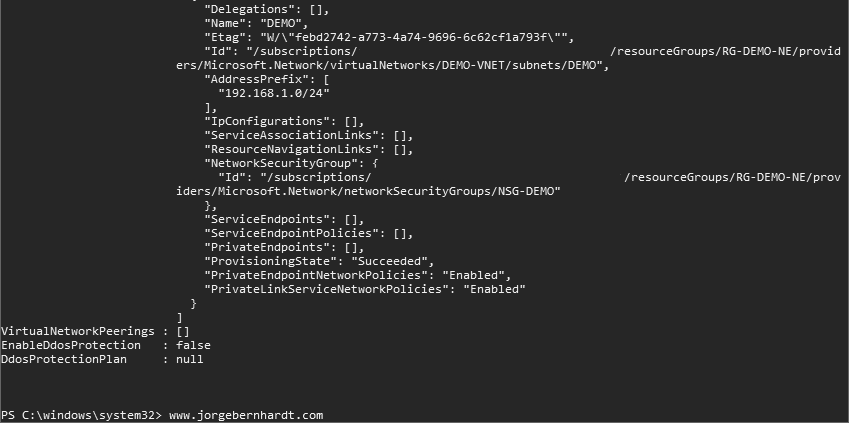
My recommendation is to apply the NSGs at the subnet level whenever possible to facilitate the administration of your virtual network. You must first verify that the subnet you want to associate is not already associated with another NSG. To do this you must use the Get-AzVirtualNetwork cmdlet with the following syntax.

$vnet = Get-AzVirtualNetwork `
    -ResourceGroupName $resourceGroupName `
    -Name DEMO-VNET
$subnet = Get-AzVirtualNetworkSubnetConfig `
    -VirtualNetwork $vnet `
    -Name "DEMO"
$subnet.NetworkSecurityGroup

Once the checks have been made, you can assign the NSG to the subnet using the following commands.

Set-AzVirtualNetworkSubnetConfig `
    -Name $subnet.Name `
    -VirtualNetwork $vnet `
    -NetworkSecurityGroupId $nsg.id `
    -AddressPrefix $subnet.AddressPrefix `
    -ResourceId $subnet.Id

Set-AzVirtualNetwork `
    -VirtualNetwork $vnet

Set-AzVirtualNetwork

Remove NSG association from Subnet>

Remove NSG association from Subnet #

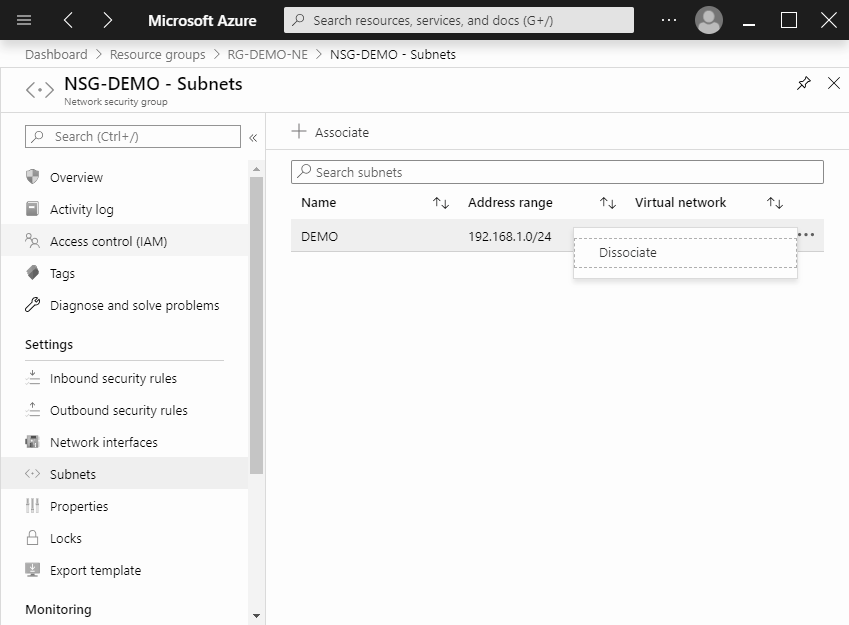
Currently, to remove a subnet level association, the Set-AzVirtualNetworkSubnetConfig cmdlet when setting the $Null value to the -NetworksecurityGroupId parameter, does not show an error but does not establish the requested change. I think it is a bug in the implementation of the cmdlet. Then to perform this task you must use the Azure portal.

Azure NSG
Another alternative is to use Azure CLI, for this you should use the following command.

az network vnet subnet update \
-n DEMO \
-g RG-DEMO-NE \
--vnet-name DEMO-VNET \
--network-security-group ""
Remove a Network Security Group>

Remove a Network Security Group #

To remove an Azure network security group, use the Remove-AzNetworkSecurityGroup cmdlet with the following syntax.

Remove-AzNetworkSecurityGroup `
    -Name "NSG-DEMO" `
    -ResourceGroupName $resourceGroupName

Important: Before attempting to eliminate the NSG, remember to disassociate it from resources.

Thanks for reading my post. I hope you find it useful.

If you want to know more about Network Security Groups, check out this link.