Jorge Bernhardt Jorge Bernhardt
  1. Posts/

How to deploy an Azure NAT Gateway

·1052 words·5 mins· 100 views · 5 likes ·
Azure CLI Azure Cloud Shell Azure PowerShell Connect-AzAccount

Hi, today I want to talk to you about Azure Virtual Network NAT, this functionality allows us to simplify and unify the outgoing Internet connectivity for virtual networks in Azure. it is configured at the subnet level and all outbound connectivity uses a single specified IP or a range of public IPs. This requires the creation of an Azure NAT gateway resource, which is part of the NAT virtual network and provides outbound Internet connectivity to one or more subnets of a virtual network. In this post, I will show you how to deploy an Azure NAT gateway using PowerShell and Azure CLI.

Features and limitations:>

Features and limitations: #

  • The public IPs used in the subnet must be of the standard type.
  • Supports a maximum of 16 public IPs
  • Only SKU Standard load balancers are compatible.
  • By default, a TCP inactivity timeout of 4 minutes is set, but it can be increased to 120 minutes.
  • When using availability zones, NAT can be implemented and isolated at the zone level.
  • The NAT data path has an SLA of 99.9%.

Important: if you have a VM in your subnet that has a public IP to allow you to access the VM. The public IP address of the VM will not be used for outgoing connections. Once explained the characteristics of the Azure Virtual Network NAT we can begin this tutorial.

Prerequisites

  • You created a Resource Group for these resources and the new ones deployed in this tutorial will join that group. If you want to know how to create a Resource Group, check out this link.
  • You already created the necessary Virtual Network and subnet. If you want to know how to create a Virtual Network, check out this link.
Azure PowerShell Workaround>

Azure PowerShell Workaround #

If you want to know how to install the PowerShell Azure module on your machine, check out this link. The simplest way to get started is to sign in interactively at the command line.

Connect-AzAccount

This cmdlet will bring up a dialog box prompting you for your email address and password associated with your Azure account. If you have more than one subscription associated with your mail account, you can choose the default subscription. To perform this task, we will use the following commands:

Get-AzSubscription
Select-AzSubscription -Subscription "My Subscription"

Once you set your default subscription, you’re ready to start.

Set the variables>

Set the variables #

Here, we define the characteristics of our environment and the resource’s properties.

$location = "northeurope"
$ResourceGroupName = "RG-DEMO-NE"
Create a public IP address>

Create a public IP address #

To create a public IP address, you must use the New-AzPublicIpAddress cmdlet with the following syntax.

$publicIP = New-AzPublicIpAddress `
  -Name PIP-PS-NE `
  -ResourceGroupName $ResourceGroupName `
  -AllocationMethod Static `
  -Location $location `
  -Sku Standard

$publicIP | Select-Object Name, IpAddress, ProvisioningState
Get-AzPubicIpAddress
>

Get-AzPubicIpAddress
#

Create a public IP address prefix>

Create a public IP address prefix #

if you want to use an IP address prefix, you should use the **New-AzPublicIpPrefix **cmdlet with the following syntax.

$publicIPPrefix = New-AzPublicIpPrefix `
  -Name PIPREFIX-PS-NE `
  -ResourceGroupName $ResourceGroupName `
  -Location $location `
  -PrefixLength 31

$publicIPPrefix | Select-Object Name, IpPrefix, ProvisioningState

Get-AzPubicIpPrefix

Create an Azure NAT gateway>

Create an Azure NAT gateway #

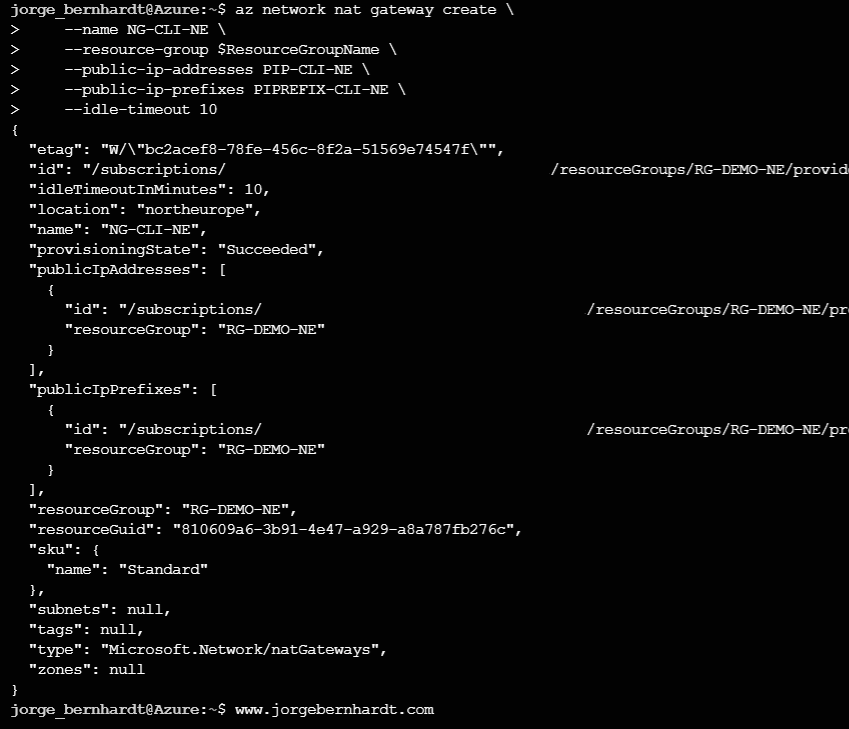
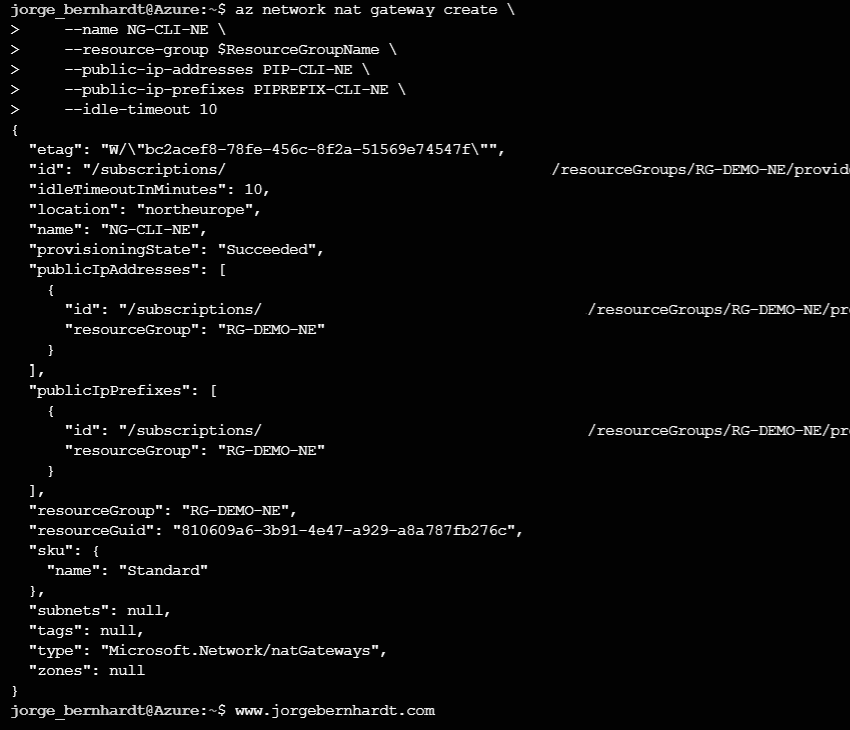
In this section, you will create an Azure NAT gateway using the New-AzNatGateway cmdlet. Here you can use the public IP and/or the range of IPs that we have previously created.

$natGateway = New-AzNatGateway `
  -Name NG-PS-NE `
  -ResourceGroupName $ResourceGroupName `
  -PublicIpAddress $publicIP `
  -PublicIpPrefix $publicIPPrefix `
  -Location $location `
  -Sku Standard `
  -IdleTimeoutInMinutes 10
Associate the subnet to Azure NAT gateway>

Associate the subnet to Azure NAT gateway #

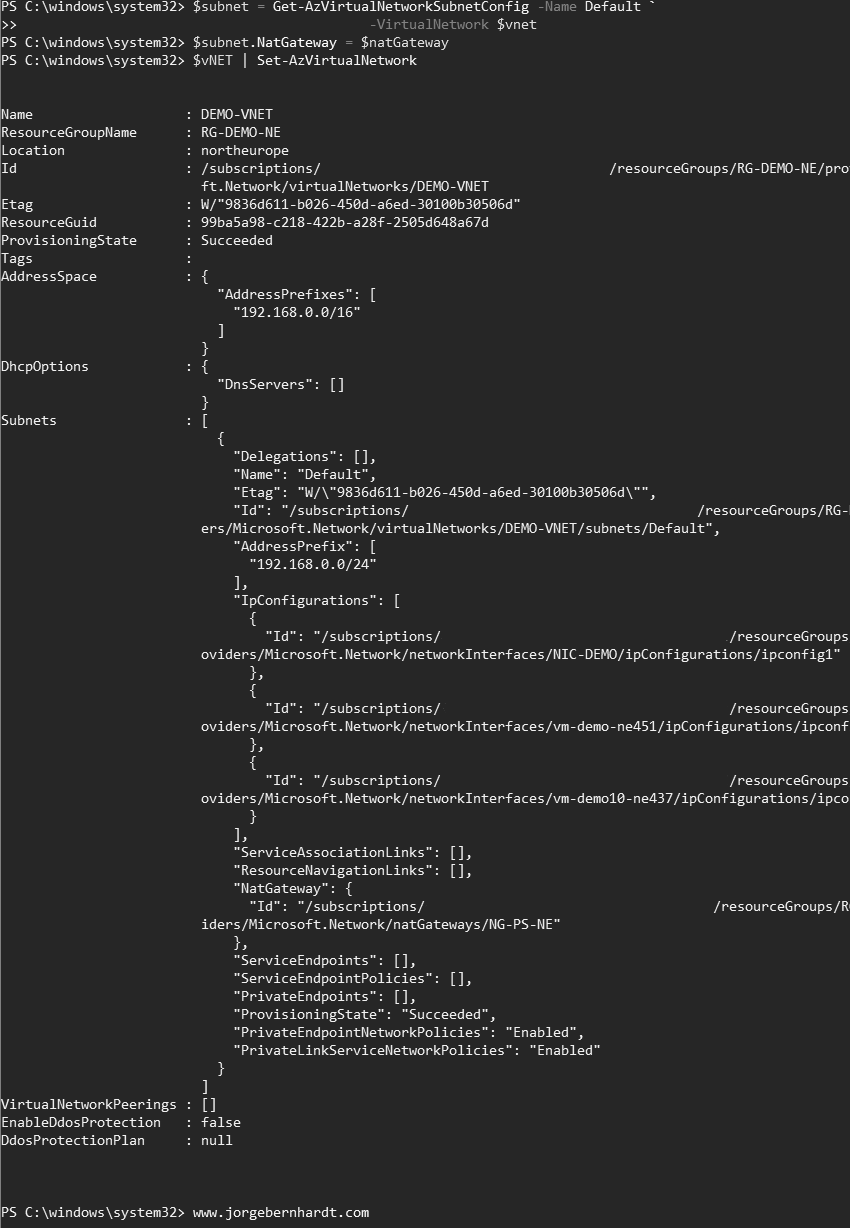
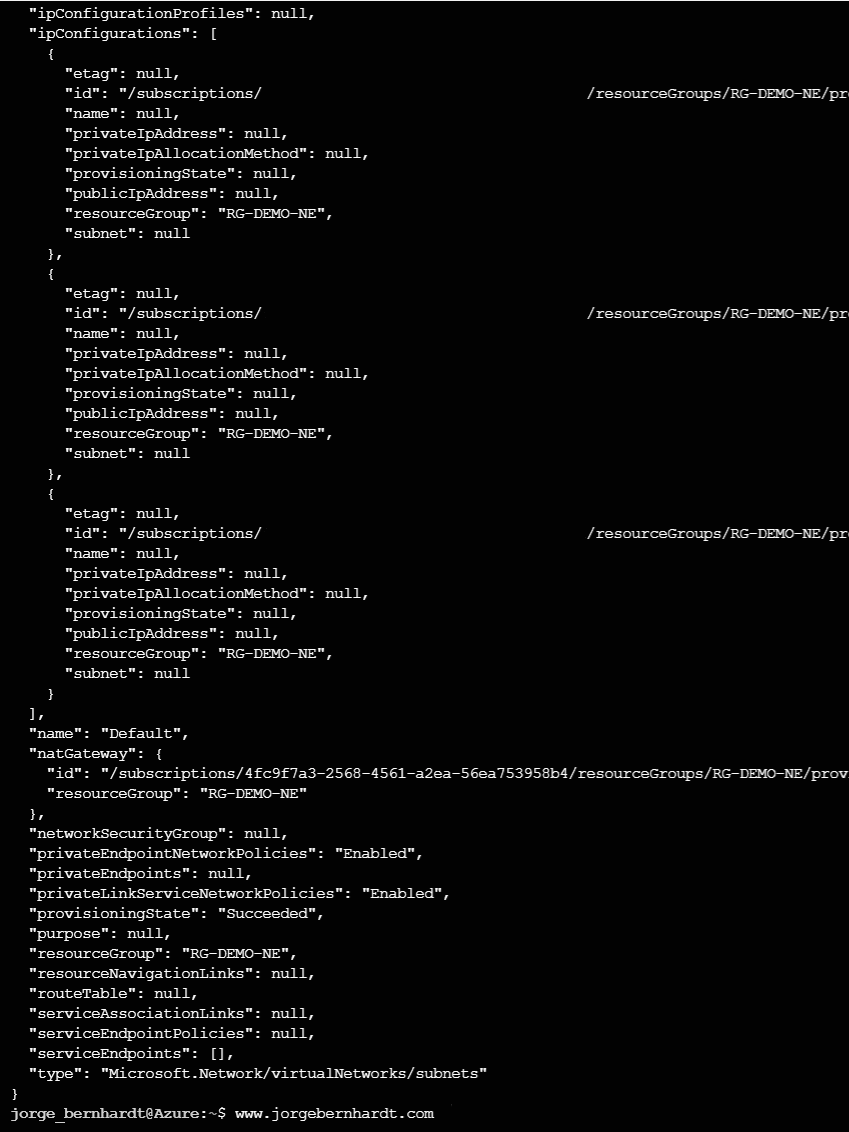
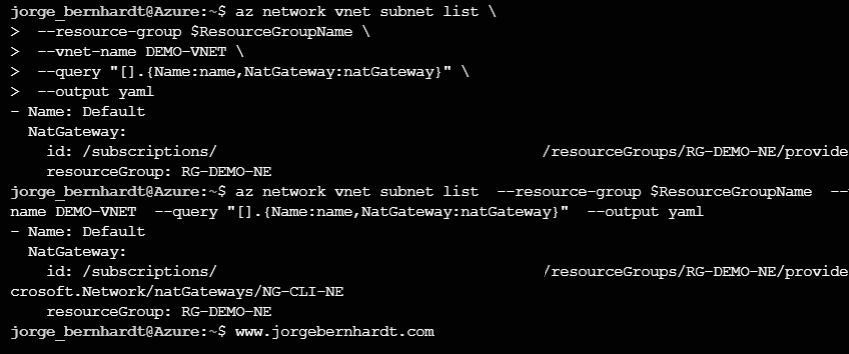
Finally, we associate the NAT Gateway resource with the desired subnet. To do this we first check that the subnet is no longer associated with another NAT Gateway.

$vNET = Get-AzVirtualNetwork `
  -Name DEMO-VNET `
  -ResourceGroupName $ResourceGroupName

Get-AzVirtualNetworkSubnetConfig `
  -VirtualNetwork $vNet `
  | Select-Object Name, AddressPrefix, NatGateway

Get-AzVirtualNetworkSubnetConfig
and then using the following commands we associate the NAT gateway with the desired subnet, in the case of this example, the “Default” subnet.

$subnet = Get-AzVirtualNetworkSubnetConfig `
  -Name Default `
  -VirtualNetwork $vNet

$subnet.NatGateway = $natGateway

$vNET | Set-AzVirtualNetwork
>

#

Verify the deployment>

Verify the deployment #

You can use the following command to verify the implementation of the NAT Gateway.

Get-AzVirtualNetworkSubnetConfig `
  -VirtualNetwork $vNet `
  | Select-Object Name, AddressPrefix, NatGateway

Azure NAT Gateway

Azure CLI Workaround>

Azure CLI Workaround #

In this case, we will use Azure Cloud Shell, a browser-based shell built into Azure Portal. This allows us to use the Azure command-line tools (Azure CLI and Azure PowerShell) directly from a browser. If you want to know more about Azure Cloud Shell, check out this 
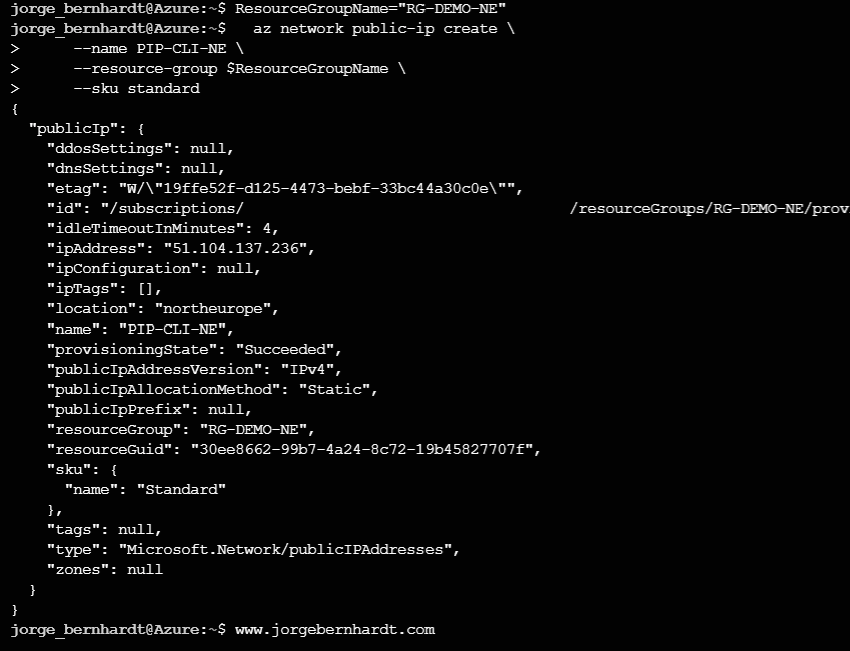
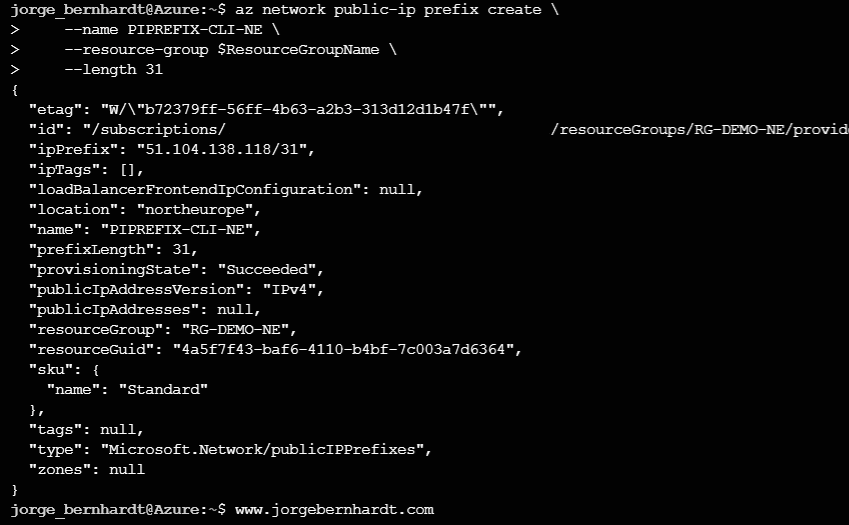
link. First, declare the variables of the resource group and define the name of the public IP prefix that will be created in the next step.

resourceGroupName="RG-DEMO-NE"
Create a public IP address>

Create a public IP address #

To create a public IP address, you must use the following command.

az network public-ip create \
--name PIP-CLI-NE \
--resource-group $ResourceGroupName \
--sku standard
Azure CLI Public IP
>

Azure CLI Public IP
#

Create a public IP address prefix>

Create a public IP address prefix #

if you want to use an IP address prefix, you should use the following command.

az network public-ip prefix create \
--name PIPREFIX-CLI-NE \
--resource-group $ResourceGroupName \
--length 31

Azure CLI Public Prefix

Create an Azure NAT gateway>

Create an Azure NAT gateway #

In this section, you will create an Azure NAT gateway. Here you can use the public IP and/or the range of IPs that we have previously created.

az network nat gateway create \
--name NG-CLI-NE \
--resource-group $ResourceGroupName \
--public-ip-addresses PIP-CLI-NE \
--public-ip-prefixes PIPREFIX-CLI-NE \
--idle-timeout 10
Azure NAT Gateway
>

Azure NAT Gateway
#

Associate the subnet to Azure NAT gateway>

Associate the subnet to Azure NAT gateway #

Finally, we associate the NAT Gateway resource with the desired subnet.

az network vnet subnet update \
--resource-group $ResourceGroupName \
--vnet-name DEMO-VNET \
--name Default \
--nat-gateway NG-CLI-NE
Azure CLI NAT Gateway
>

Azure CLI NAT Gateway
#

Verify the deployment>

Verify the deployment #

You can use the following command to verify the deployment.

az network vnet subnet list \
--resource-group $resourceGroup \
--vnet-name DEMO-VNET \
--query "[].{Name:name,NatGateway:natGateway}" \
--output yaml

Azure NAT Gateway

Thanks for reading my post. I hope you find it useful.

If you want to know more about Azure Virtual Network NAT, check out this link.