How to map a Network Drive to an Azure File Share
In a previous post, I explained how to create an Azure file share. Today, I want to show you how to connect and mount an Azure file share with Azure PowerShell.
Prerequisites #
- This tutorial assumes that you already have a Microsoft Azure account configured.
- You can use an existing Azure File Share, or you can create a new one. If you want to know how to create an Azure File Share using PowerShell, check out this link.
Azure PowerShell Workaround #
If you want to know how to install the PowerShell Azure module on your machine, check out this link. The simplest way to get started is to sign in interactively at the command line.
Connect-AzAccount
This cmdlet will bring up a dialog box prompting you for your email address and password associated with your Azure account. If you have more than one subscription associated with your mail account, you can choose the default subscription. To perform this task, we will use the following commands:
Get-AzSubscription
Select-AzSubscription -Subscription "My Subscription"
Once you set your default subscription, you’re ready to start.
Set the variables #
Here, we define the characteristics of our environment and the resource’s properties.
$resourceGroupName = "RG-DEMO-NE"
$storageAccountName = "stoaccountps"
$storageKey = (Get-AzStorageAccountKey -ResourceGroupName $resourceGroupName -Name $storageAccountName).Value[0]
$shareName = "logsps"
Pre-Checks #
If you connect from a computer from outside the Azure network, remember to open outgoing TCP port 445 on your local network.
Test-NetConnection `
    -ComputerName "$storageAccountName.file.core.windows.net" `
    -Port 445
Let’s go #
Using the ConvertTo-SecureString cmdlet we convert the account key into a secure string.
$accountKey = ConvertTo-SecureString `
    -String "$storageKey" `
    -AsPlainText `
    -Force

$credential = New-Object `
    -TypeName System.Management.Automation.PSCredential `
    -ArgumentList "Azure\$storageAccountName", $accountKey

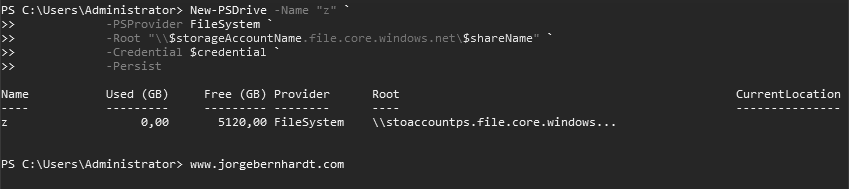
New-PSDrive `
    -Name "Z" `
    -PSProvider FileSystem `
    -Root "\\$storageAccountName.file.core.windows.net\$shareName" `
    -Credential $credential `
    -Persist
cmdkey /add:<StorageAccountName>.file.core.windows.net /user:Azure\<StorageAccountName> pass:<StorageAccountKey>
For the correct execution of the command, you should replace the
cmdkey.exe /delete:<StorageAccountName>.file.core.windows.net
Thanks for reading my post. I hope you find it useful.
To know more about Azure File services, check out this link.