How to enable the system-assigned managed identity on an Azure VM
Hi, Jorge is back. In this post, I want to show you How to enable the system-assigned managed identity on an Azure VM using Powershell and Azure CLI. When you enable a system-assigned managed identity, Azure creates an identity associated with the instance and stores it to the Azure AD tenant associated with the subscription where you created the service instance. If you decide to delete the service instance, Azure automatically deletes the managed instance associated with the service instance stored in the Azure AD tenant.
Important: Your account needs the Virtual Machine Contributor role assignment to enable system-assigned managed identity on an Azure Virtual Machine.
Azure PowerShell Workaround #
If you want to know how to install the PowerShell Azure module on your machine, check out this link. The simplest way to get started is to sign in interactively at the command line.
Connect-AzAccount
This cmdlet will bring up a dialog box prompting you for your email address and password associated with your Azure account. If you have more than one subscription associated with your mail account, you can choose the default subscription. To perform this task, we will use the following commands:
Get-AzSubscription
Select-AzSubscription -Subscription "My Subscription"
Once you set your default subscription, you’re ready to start.
Set the variables #
Here, we define the characteristics of our environment and the resource’s properties.
$resourceGroupName="RG-DEMO-WE"
$vmName="VM-DEMO-WE"
The following command will store the VM in a variable to pass as a parameter in the next step.
$vm = Get-AzVM `
    -Name $vmName `
    -ResourceGroupName $resourceGroupName
Enable system-assigned managed identity #
To enable the identity of the managed service on your virtual machine, you must use the Update-AzVM cmdlet with the following syntax.
Update-AzVM `
    -VM $vm `
    -IdentityType SystemAssigned `
    -ResourceGroupName $resourceGroupName
Verify the changes made #
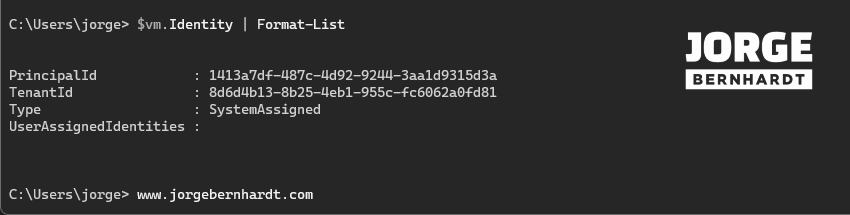
Once identity is enabled, you can get the VM’s managed identity information using the following command.
$vm.Identity | Format-List
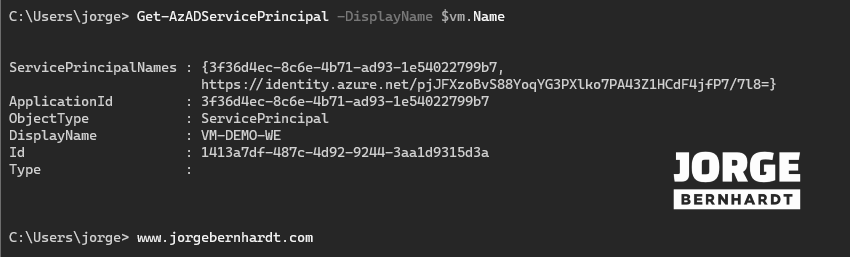
Get-AzADServicePrincipal `
    -DisplayName $vm.Name
Disable system-assigned managed identity #
To disable the system-assigned managed identity on your virtual machine, follow these steps.
$vm = Get-AzVM  -Name $vmName -ResourceGroupName $resourceGroupName

Update-AzVm -VM $vm -IdentityType None -ResourceGroupName $resourceGroupName
Remember that disabling the virtual machine identity also removes the service principal from your Azure AD tenant.
Azure CLI Workaround #
In this case, we will use Azure Cloud Shell, a browser-based shell built into Azure Portal. This allows us to use the Azure command-line tools (Azure CLI and Azure PowerShell) directly from a browser. If you want to know more about Azure Cloud Shell, check out this link. First, we define the characteristics of our environment and store the values in variables.
resourceGroupName='RG-DEMO-WE'
vmName="VM-DEMO-WE"
Enable system-assigned managed identity #
Once you have all the necessary information, you can enable the system-assigned managed identity on an Azure VM with the following command.
az vm identity assign \
--identities [system] \
-n $vmName \
-g $resourceGroupName
Verify the changes made #
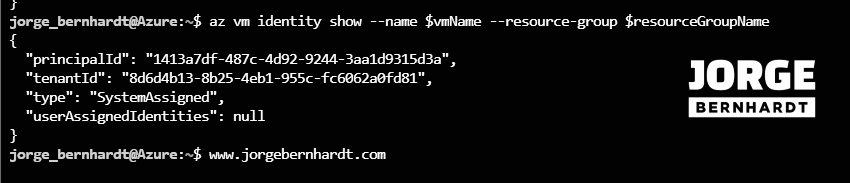
To get the VM’s managed identity info. You should use the following command.
az vm identity show \
--name $vmName \
--resource-group $resourceGroupName
spID=$(az resource list -n $vmName --query [*].identity.principalId --out tsv)
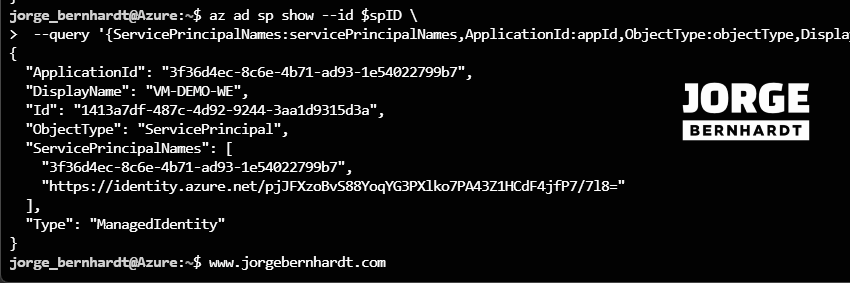
az ad sp show \
--id $spID \
--query '{ServicePrincipalNames:servicePrincipalNames,ApplicationId:appId,ObjectType:objectType,DisplayName:displayName,Id:objectId,Type:servicePrincipalType}'
Disable system-assigned managed identity #
Finally, follow these steps if you want to remove the system-assigned managed identity on your virtual machine.
az vm update \
-n $vmName \
--set identity.type="none" \
-g $resourceGroupName
Remember that disabling the virtual machine identity also removes the service principal from your Azure AD tenant.
Thanks for reading my post. I hope you find it helpful.
In the next post, I will show you how to use a VM system-assigned managed identity to access Azure Key Vault
For more information about managed identities for Azure resources, check this link.